
How to Sew Patch Pockets
One of my favorite garments to wear is the Shift Dress pattern from my book Skirts & Dresses For First Time Sewers. When I wrote the book, elements had to be pared down to the minimum to keep the projects super beginner, so things like patch pockets were left off. But when I make it for myself, I nearly always add patch pockets on the front of the dress.
The way I sew on a patch pocket isn't groundbreaking in any way, and it is the way most people seem to do it too. But if this is a new skill to you, there are some good pointers that can elevate a simple patch pocket to a well-sewn one. I hope you all find this helpful, and do ask me anything in the comments if you have questions!
1. Prepare Your Pattern & Garment
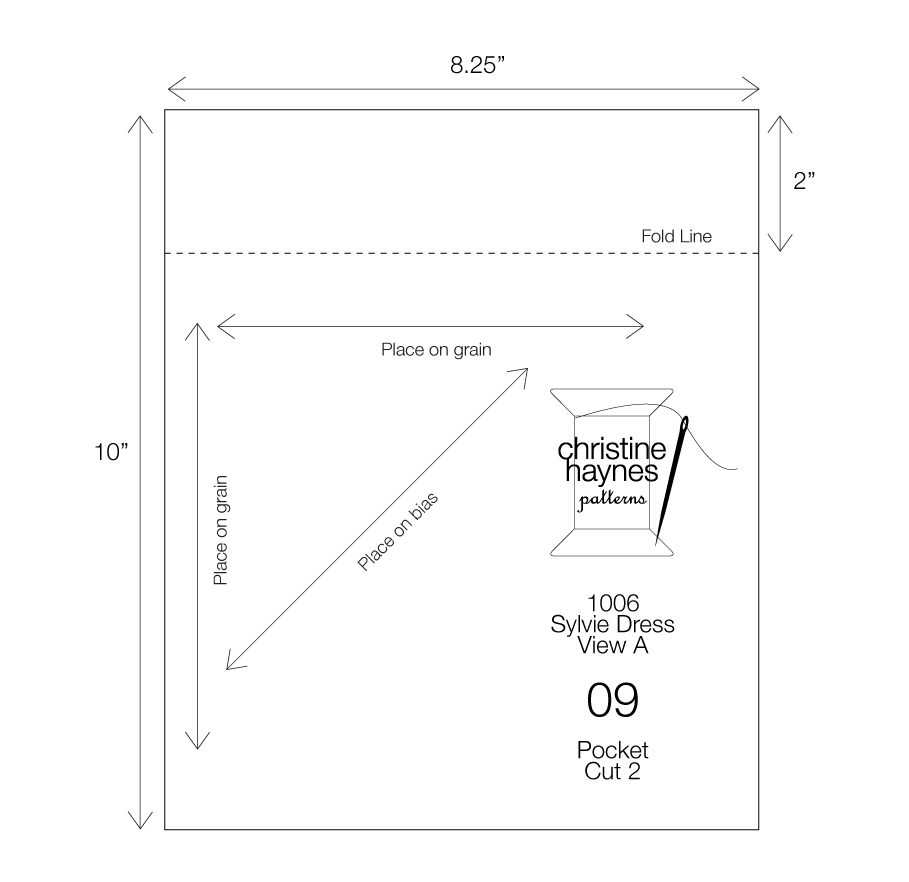
I like to use the pocket from my Sylvie Dress pattern. To me it's the perfect size to go onto a dress or skirt, as it's big enough to fit my entire hand in, or slip my phone in, but not too big. I think a small patch pocket can make the wearer of the dress look bigger than they are because it's just not proportionate. If you don't have my Sylvie Dress pattern to use the pocket, no worries, simply cut one rectangle for each pocket you want to sew 8.25" wide x 10" tall. I know that seems giant, but we will be using a 5/8" seam allowance on the bottom and sides, then folding the top an additional 2", so don't worry if it seems huge now.
For the garment the pockets are going onto, it's much easier to sew these on if you have not yet constructed the garment. If going onto the front of a shift dress, do this after stay stitching the neckline, but before assembling the side seams or shoulder seams.
2. Cut Your Pockets
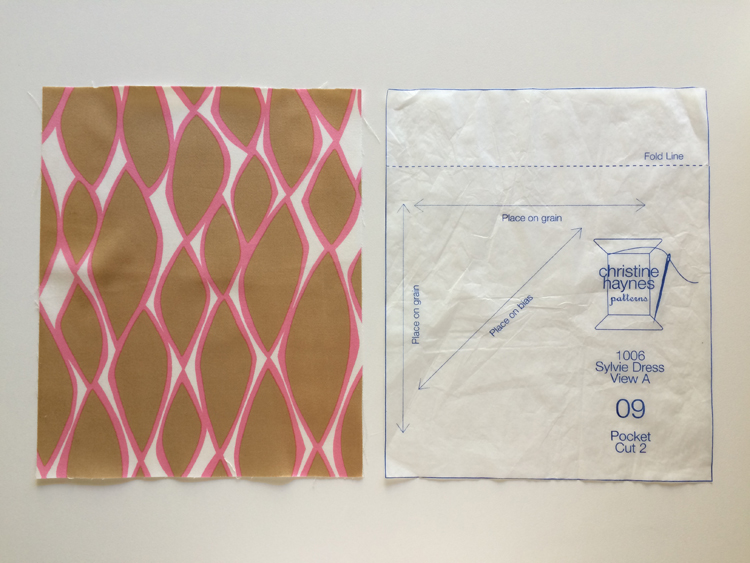
Because the pocket has nothing to do with the fit of the garment, you can cut it on the length of grain, crossgrain, or on the bias. If you're using a stripe, gingham, or plaid, using the print on the bias or in the opposite direction of the print it's being sewn to can be a really nice detail. For my Sylvie Dress example in gingham I placed the pockets on the bias, as pictured in the photo at the top of the post. Cut one rectangle for each pocket you want to sew.
3. Mark The Fold

At the 2" mark from the top of the pocket, there is a fold line. Mark this spot by simple making a small snip on the side edge of the pocket at that line. You could also use a water soluble marking tool, but I like the ease of making a small snip.
4. Fold Top Edge

Fold the top edge of the pocket, wrong sides together, about 1/4"–3/8" and press. Do not sew, just simply fold and press.
5. Create Top Fold

Using the marks you made in step three, fold the fabric, right sides together, and pin in place. DO NOT PRESS this fold in this step! We will actually be pressing this top fold the other direction in coming steps, so do not press it during this step.
6. Sew Around Pocket

With the top fold pinned in place, stitch all the way around the entire pocket at a 5/8" seam allowance. You will be sewing the top fold in place, and simply sewing through the single layer of the pocket along the sides and the bottom. Be sure to pivot at the bottom corners at 5/8". If you need to mark those turns, do so with a seam gauge and a water soluble marking tool.
7. Trim Corners

At the top corners, trim off a triangle of fabric to reduce the bulk at the top. This will allow it to poke out clean and sharp without any additional bulk.
8. Turn Corners

Turn the upper fold right side out and poke out the corners. I like to use a point turner or a metal knitting needle to help me form a perfect corner. This large fold on the inside of your pocket is a nice finish so that when seeing into the top part of your pocket, it's the finished fabric for 1 3/4" instead of the wrong side of the fabric. Much more elegant!
9. Press Top Fold

Now is the time when we want to press that top fold. Make sure that your pressing it with the flap an even 2" across, as when we sew it in place, it will be noticeable if it is not even.
10. Press Sides

Using the 5/8" stitch line as your guide, press the two sides into the pocket, wrong sides together. Roll the stitch line just to the wrong side, so it's not visible on the right side.
11. Press Bottom
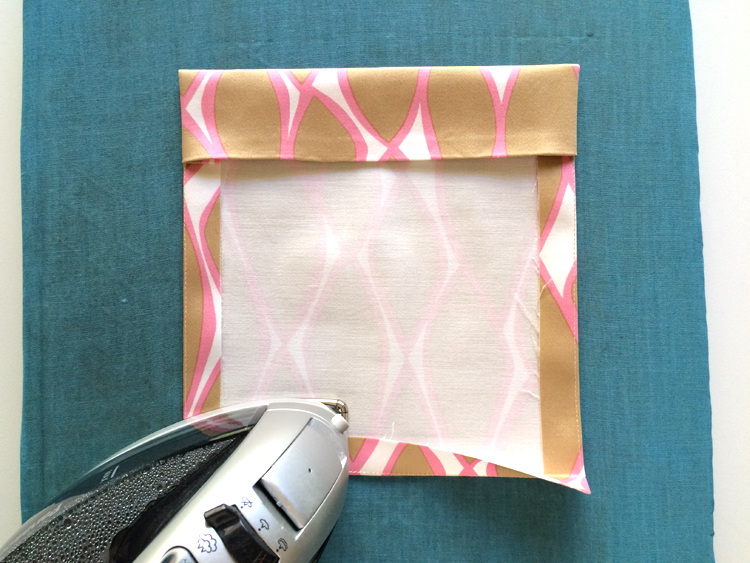
Using the 5/8" stitch line again, fold and press the bottom of the pocket up, wrong sides together. Be careful to press the bottom corners so they do not stick out beyond the sides of the pocket.
12. Sew Top Fold

Stitch the top fold in place by sewing close to the lower edge of the fold. I prefer to do this from the right side of the pocket as my upper thread stitch is better than my bobbin thread stitch. It is more important that it be straight in line with the top of the pocket, than with the fold on the inside, so that's the edge I follow when sewing it in place. Give the fold and stitching a good press after sewing.
13. Pin Pocket to Garment

If you are using a garment that calls for patch pockets, there will be markings on the pattern piece as to where you should place them for sewing. But if you are adding them to a garment that doesn't already have those markings, it's up to you to figure out where they should go. It's easy when sewing on one pocket, but for a pair it's trickier, as they need to be perfectly level with each other. To find where I want them to go, I pin them in place so that my elbows are slightly bent when in the pocket. Your arms shouldn't be fully extended to reach the bottom of the pocket, and also if you have your hands in them, your arms shouldn't be too folded. It's that happy middle place. Once you've settled on a spot, pin them in place. I always pin the top and center in addition to the bottoms and sides, even though I'm not sewing there, as I find it helps to stabilize them and keep them flat.
14. Mark Reinforcement

I like to do a small triangle of reinforcement at the top corners of my patch pockets. It looks more polished, but it also serves a purpose to help strengthen the top edges. To keep the stitching consistent from side to side, I like to mark how far out I'm going, and draw the line from the top to the stitching line. That way each side of the pocket's stitching is the same. My triangle line is 1/4" from the side, but you can make yours whatever you like.
15. Sew Pocket to Garment

Because of our fancy corners, we have to sew the pocket in a very specific directional order. The above illustration is taken from my Sylvie Dress instructions, showing you the order of the sewing. Starting at the top fold stitching, sew towards the top of the pocket, across to the corner, down the right side, across the bottom, up the left side, across to your mark, ending at the top fold stitching. Stitch the pocket 1/8" from the fabric's edge. Your corners should now look like the image below.
And that's it! Give your pocket a good press, and carry on the same way with your matching pocket if you desire a pair. Let me know if you have any questions in the comments below, and here's to putting pockets on everything!