Emery Dress Sewalong: Narrow & Wide Shoulder Adjustments
In today’s Emery Dress Sewalong post, we will learn two more very common alterations: how to do a narrow or a wide shoulder adjustment. I have narrow shoulders, so making the shoulders narrower is an alteration I have to do on nearly every single garment I sew. Both of these are very simple, and take no time at all. Let’s get to it!
WIDE SHOULDER ADJUSTMENT
What is a wide shoulder adjustment?
A wide shoulder adjustment increases the length of the shoulder seam between the neckline and the sleeve.
How do I know if I need a wide shoulder adjustment?
If you are in need of a wide shoulder adjustment, you may have noticed that the cap of the sleeve sat too high on your muslin mock up. Luckily for you, this is a simple adjustment that can really have a huge impact on the overall fit of the garment. Remember: If you widen the bodice front, you will also want to widen the bodice back!
How to do a wide shoulder adjustment

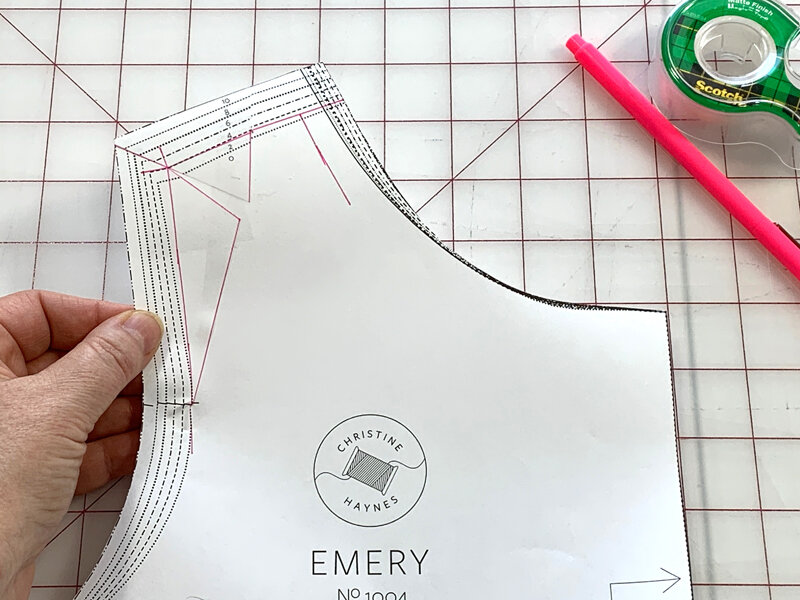
1. Begin by cutting the bodice pieces in your desired size. Again, I highly recommend you trace your patterns off onto tracing paper, especially when making alterations.

2. Draw the sewing lines on the upper armscye (starting right below the sleeve notch, the shoulder, and a small portion of the neckline.

3. Find and mark the center of your shoulder seam.

4. Draw a line from the center of the shoulder to the sleeve notch. This is line “A”.

5. Draw a second line starting at the outer corner (cut edge) of the shoulder seam, through the corner of the sewing line, stopping at line A. This will be line “B”.

6. Carefully cut through line A, starting at the shoulder and ending at the armscye sewing line.

7. Next, cut through line B, starting at line A, but stop at the sewing line. Make a second cut through line B, starting at the corner, but stop again at the sewing line, leaving a small paper hinge, as pictured above.

8. Tape the inner portion of your shoulder along line A to a piece of paper.

9. Use a ruler and fine point pencil to extend the sewing line the desired amount. In this example, I am extending the shoulder by 0.5”.

10. Tape the outer shoulder in place, lining the existing sewing line up with the extended one.

11. Tape the left side in place.

12. Using the new sewing line, re-draw the seam allowance at the top of the shoulder.

13. Trim away the excess paper and secure with tape as necessary. And that’s it!
NARROW SHOULDER ADJUSTMENT
What is a narrow shoulder adjustment?
A narrow shoulder adjustment decreases the length of the shoulder seam between the neckline and the sleeve.
How do I know if I need a narrow shoulder adjustment?
If you are in need of a narrow shoulder adjustment, you may have noticed that the cap of the sleeve sat too far off your shoulder. This is a very simple adjustment, so let’s fix it! Remember: If you reduce the bodice front, you will also want to reduce the bodice back!
How to do a narrow shoulder adjustment
1. Follow steps 1–7 above under the wide shoulder adjustment instructions to prepare your pattern in the exact same way.

2. Mark to the right of line A, on the sewing line, the distance you need to shorten the shoulder by. For this example, I shortened it by 0.5”.

3. Bring the left side over to meet at the mark from the previous step. Line up the sewing lines and tape in place.

4. Carefully trim off any excess paper.
5. And that’s it! You should now have something that looks like the image above. Well done!