Emery Dress Sewalong: Full & Small Bust Adjustments
Today’s Emery Dress Sewalong post is all about how to do full and small bust adjustments. These are incredibly common adjustments and if you are either small or full busted, an adjustment that you are likely faced with often when sewing your own clothes. But this is exactly why making your own wardrobe is so rewarding: you can actually make it to fit your body! So, let’s get right to it!
FULL BUST ADJUSTMENT
What is a Full Bust Adjustment?
A full bust adjustment (or FBA) is a patternmaking technique that allows us to open a pattern up in the bust area to accommodate for a fuller cup, without having to enlarge the pattern in other areas.
How do I know if I need a FBA?
Many pattern companies draft patterns based on a B cup, and we are no exception. This is because a B cup is a very common cup size, and we gear our patterns towards the majority. Chances are, if you are a C cup, a full bust adjustment wont be entirely necessary, but if you are any more ample than a C cup you will require a FBA.
Full busted ladies might notice some things when you make a pattern straight out of the envelope for yourself:
If you make the size based on your bust measurements, the garment will be too large in the shoulders, waist, and potentially the sleeves as well.
If you make a size based on your waist, the garment will flatten your chest creating the dreaded “mono-boob” – not a cute look!
Picking a size
If you are making a FBA to your Emery Dress, you will want to choose your size based on two measurements:
Your waist
Your upper bust
Your upper bust is the area right below your armpit and above the fullest part of your bust. These two measurements should dictate the size you will need to cut. For our example, let’s say your upper bust measures 38” and your waist measures 31”. If so, you need to make a size 12.
You will also need to take your full bust measurement. The difference between your upper bust and full bust is the amount you will need to open up your bodice. For our example, let’s say your bust measures at 41”, so the difference is 3”.
How to do a Full Bust Adjustment (FBA)
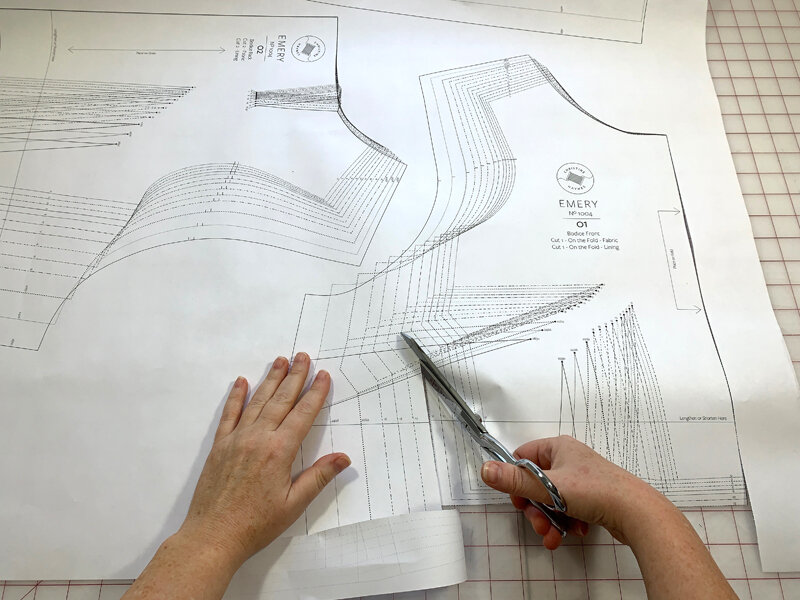
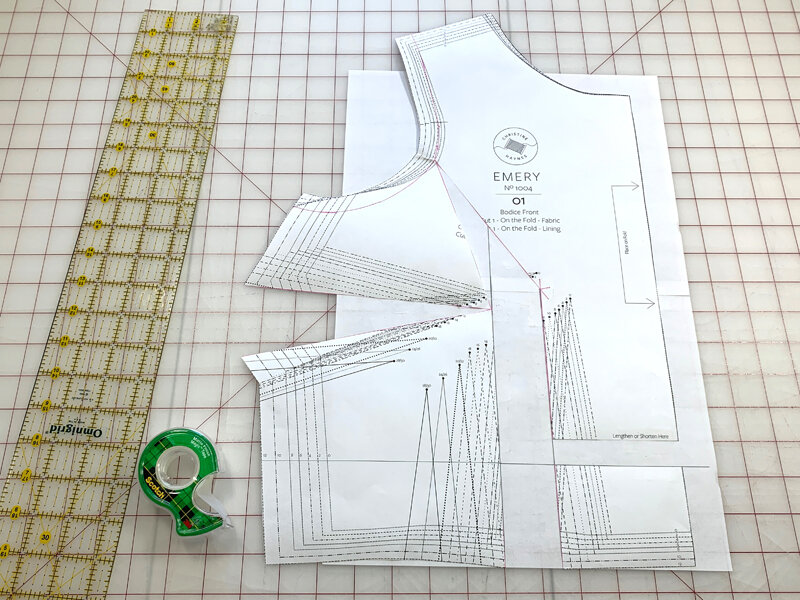
1. Prepare your pattern by cutting out (or tracing - highly recommend) the appropriate size based on your upper bust and waist size.

2. Mark the sewing line along the armscye following the 5/8” seam allowance.

3. Draw a line through the center of the bust dart, extending through the dart point to the bust point. We will call this line “A”.

4. Draw a line through the center of the waist dart, extending past the dart point to meet line A. Make sure this line is parallel to the grainline (on the Emery Dress bodice, the “place on fold” line is your grainline). This is line “B” and where line A and B intersect is the bust point.

5. Draw a third line from the bust point to the armscye sewing line, at roughly the center point. This is line “C”.

6. Your bodice front piece should now have these three lines drawn on them.

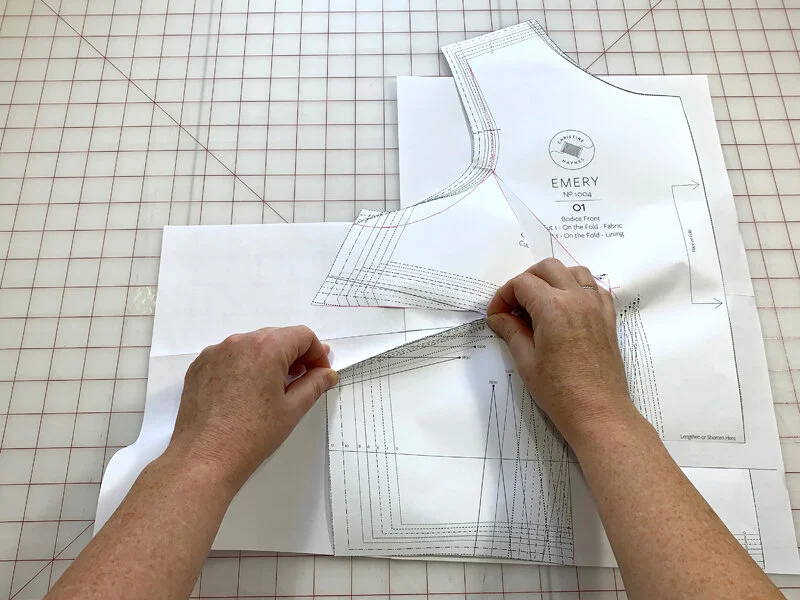
7. Cut through line B starting at the waist, pivot at the bust point, and continue cutting through line C, stopping at the armscye sewing line.

8. Next, cut through line A, starting at the side seam, leaving a small paper hinge at the bust point. Do not cut all the way through the bust point.

9. Now the pattern is slashed and ready to be opened up the desired amount (the upper bust to full bust difference). Since we have two bust points, divide the difference by two and draw two parallel lines that distance apart. For our example, we are opening up a total of 3”, so that divided by two bust points is 1.5”. That is the amount you want to draw on your paper, so our lines above are 1.5” apart.
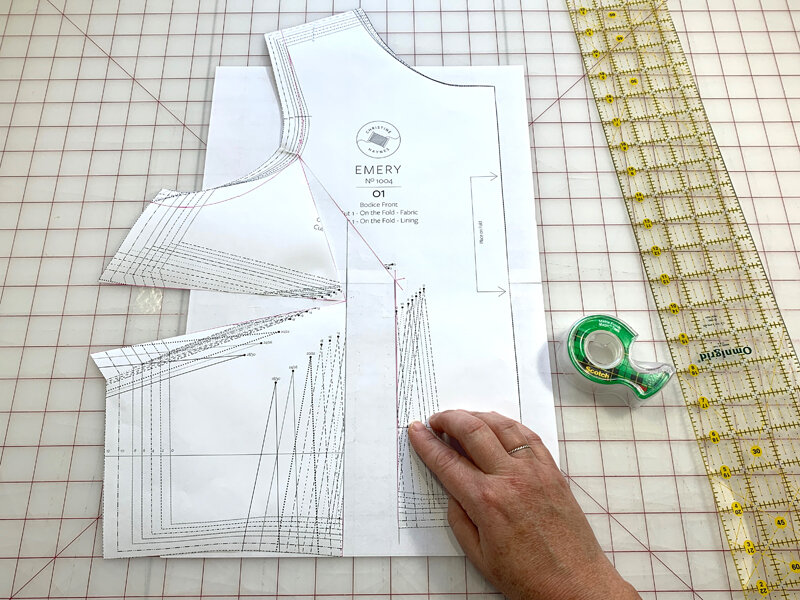
10. Very carefully lay your slashed pattern on top of the paper. the hinge that you created at the side dart should allow you to maneuver your B lines so that they lay on your parallel guidelines. Carefully tape down your pattern to the paper, leaving the center front below the lengthen/shorten line free.
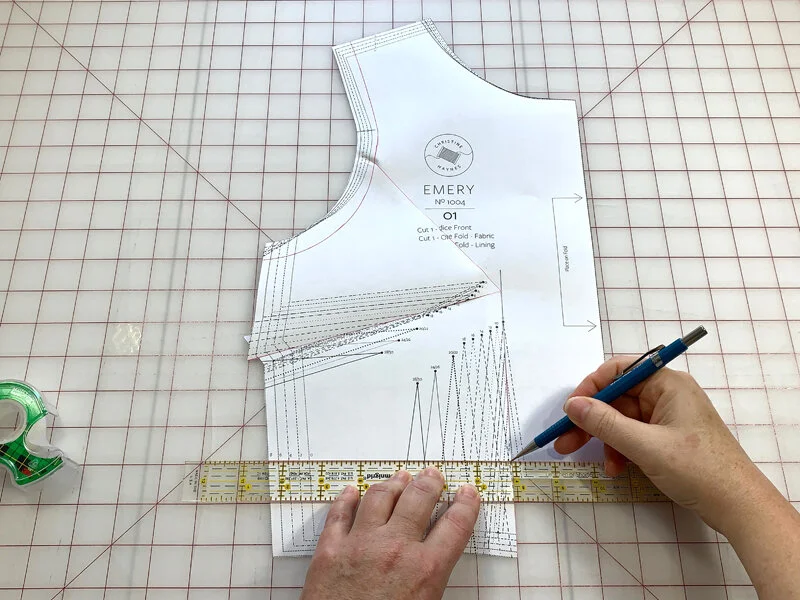
11. You will notice that the waistline of your pattern is now two different lengths. To correct this, cut at the lengthen/shorten line at the center front.

12. With a ruler and pencil, extend the lengthen/shorten line from the left side of your pattern, across the right side.
13. Line up the piece you cut off in step 11 with the lengthen/shorten line at the top, and the opening at the center, and tape in place. Hang in there, you’re almost done!

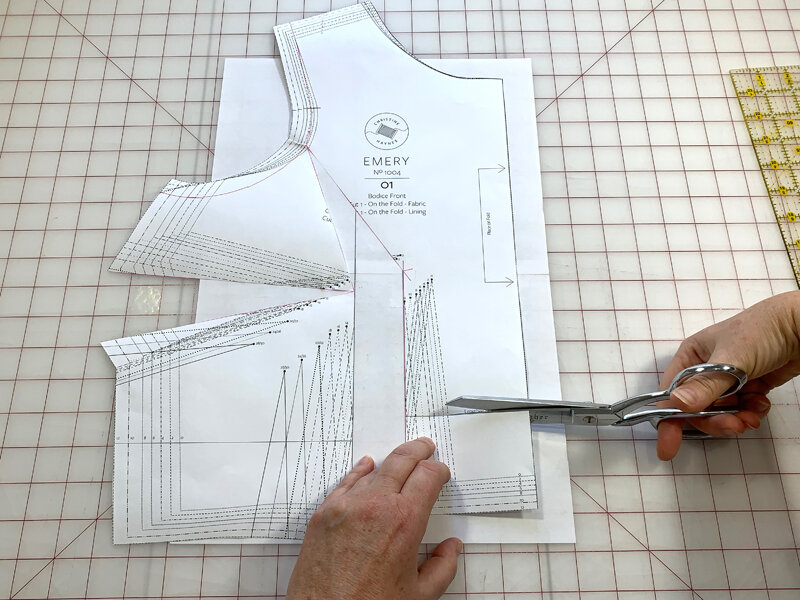
14. Line up your ruler with the waist dart point (use the dart point that is lower), and keeping level with the grainline, draw a line perpendicular to your grainline and level with your dart point in the opening.

15. Find the center of the line you drew in the last step. This is your new waist dart point. Use your ruler to re-draw the dart legs from the waist to this new point.

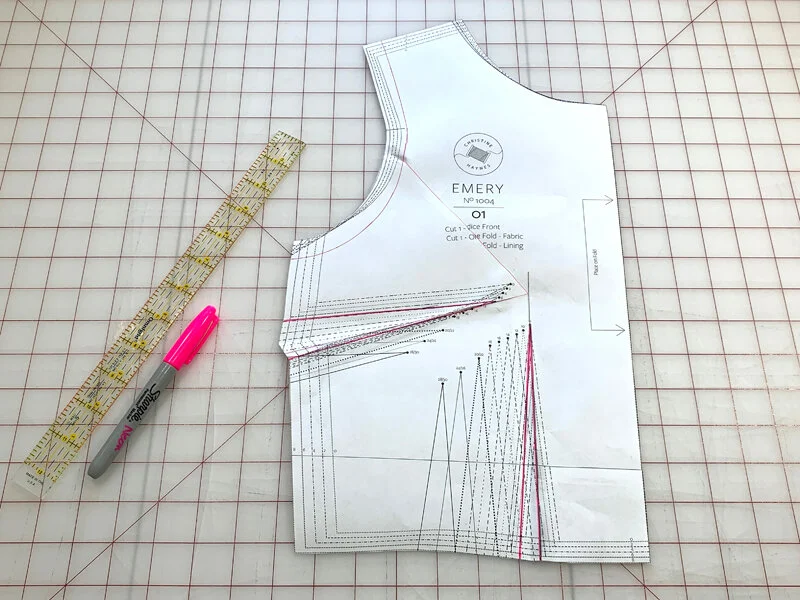
16. On the bust dart, draw a line directly down the center of your dart all the way to the bust point.

17. Measure 1.5” (the distance we opened the pattern) back from the bust point and mark. This is your new dart point.

18. Re-draw your dart legs from the side seam to this new dart point.

19. In order to get the correct angles on the side seam, we need to fold the dart as if it was being sewn. Fold the bottom of the dart and bring it up to meet the upper line, just like if they were sewn and pressed. Since we are doing this on paper, it feels awkward, but remember that a dart is what takes our flat pattern piece and shapes it around our curves, so once it’s folded, it will no longer be flat. Don’t be alarmed by this!

20. Follow the side seam for your size and trim off the excess, cutting through the folds.

21. Your bust dart should look something like this now. Yay!


22. Repeat that same process at the waist dart. Note that you might need to add paper at the side seam and waist seam along the way, just as I did. This is totally fine!

23. Finish by trimming away any extra paper and taping down as needed. I suggest using a sharpie to clearly mark your new darts as I did above so you can see them easily when sewing. Congrats! You did a FBA!
SMALL BUST ADJUSTMENT
What is a Small Bust Adjustment?
A small bust adjustment (or SBA) is a patternmaking technique that allows us to close a pattern up in the bust area for a smaller cup, without having to shrink the pattern in other areas.
How do I know if I need a SBA?
Much like full busted ladies, women with a smaller bust may find a pattern straight out of the envelope to be less than ideal in fit. If you are an A cup or smaller, a small bust adjustment can greatly improve the fit of your bodice.
Small busted ladies might notice some things when you make a pattern straight out of the envelope for yourself:
If you make the size based on your bust measurements, the garment will be too small in the shoulders, waist, and potentially the sleeves as well.
If you make a size based on your waist, the garment will sag with excess fabric in the bust. Not flattering!
Picking a size
If you are making a SBA to your Emery Dress, you will want to choose your size based on your waist measurement. This gives you a better idea of your size based on your frame rather than your bust.
Try on your muslin bodice. Carefully pinch and pin any excess fabric at both bust points. This amount is the amount you will need to reduce your pattern by. In the photos below, I am decreasing by 0.5”, this will likely be the amount you will need to decrease by if you are an A cup.
How to do a Small Bust Adjustment (SBA)
1. Follow steps 1–8 above under the FBA instructions to prepare your pattern in the exact same way.

2. Draw a line parallel to the center front portion of line B the amount you want to reduce. I am reducing this pattern by 0.5” at each bust point, so my line is 0.5” away from the opening.

3. Carefully bring the left side of line B over to meet your reduction line drawn in the previous step.

4. Secure lines C and A with tape. Tape line B down until you reach the lengthen/shorten line.

5. You will notice that the waistline of your pattern is now two different lengths. To correct this, cut at the lengthen/shorten line at the center front.
6. With a ruler and pencil, extend the lengthen/shorten line from the left side of your pattern, across the right side.

7. Line up the piece you cut off in step 5 with the lengthen/shorten line at the top, and the grainline on the right (center front edge), and tape in place.

8. Re-draw the waist dart legs using the original dart point and the original spots along the waist.


9. Repeat by re-drawing the bust dart legs using the original dart point and the original spots along the side seam.

10. In order to get the correct angles on the side seam, we need to fold the dart as if it was being sewn. Fold the bottom of the dart and bring it up to meet the upper line, just like if they were sewn and pressed. Since we are doing this on paper, it feels awkward, but remember that a dart is what takes our flat pattern piece and shapes it around our curves, so once it’s folded, it will no longer be flat. Don’t be alarmed by this!

11. Follow the side seam for your size and trim off the excess, cutting through the folds. You should have a side seam that looks like this now!


12. Repeat that same process at the waist dart.
13. Finish by trimming away any extra paper and taping down as needed. I suggest using a sharpie to clearly mark your new darts as I did above so you can see them easily when sewing. Congrats! You did a SBA!